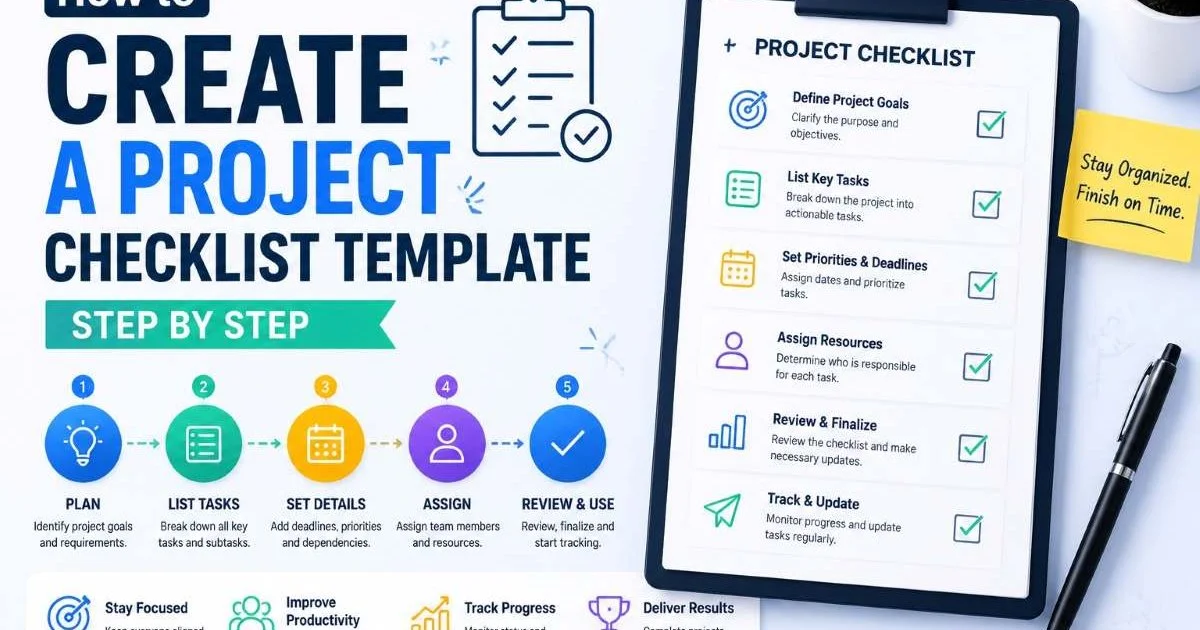
Learning how to create a project checklist template step by step is one of the most practical skills a project manager or team lead can develop. A well-built checklist template saves hours of repeated planning, reduces human error, and gives your team a reliable framework for executing work consistently.
Whether you're running a software launch, coordinating a marketing campaign, or managing an office relocation, a reusable template keeps everyone aligned. Without one, you risk missed tasks, duplicated efforts, and the slow erosion of team confidence. The process isn't complicated, but it does require thoughtful structure.
This guide walks you through four clear steps to build a project checklist template you'll actually use, complete with tips, common mistakes, and practical examples drawn from real project management scenarios.
Key Takeaways
- Define your project scope before writing a single checklist item.
- Break large deliverables into small, actionable tasks with clear ownership.
- Use categories and priority levels to organize your template logically.
- Test your template on a real project before rolling it out broadly.
- Iterate based on feedback; no template is perfect on the first draft.
1. Define Your Project Scope and Objectives
Every solid checklist template begins with clarity about what the project is supposed to achieve. Before you list a single task, write down the project's primary goal, expected deliverables, and success criteria. If you're building a template for recurring projects (like quarterly audits), document the standard scope so future users understand the boundaries. This step prevents scope creep from infiltrating your template and turning it into an unwieldy document that nobody follows.
A project checklist only works when it reflects the actual work required. Spend 20 to 30 minutes interviewing key team members about what tasks they perform during similar projects. You'll often discover steps that exist only in someone's memory, never written down. Capturing these hidden tasks early is what separates a good template from a mediocre one, and it builds trust with the people who will actually use it.
Interview at least three team members from different roles to uncover tasks you might miss on your own.
Identify Stakeholders and Constraints
List everyone who has a stake in the project's outcome, from the sponsor approving budgets to the end user receiving the deliverable. Note any constraints like budget limits, regulatory requirements, or technology restrictions. For example, an audit checklist for a financial services team will have compliance requirements that a marketing launch checklist won't. These constraints shape which tasks appear in your template and which quality checks you need to include.
At the end of this step, you should have a one-page scope document that includes the project goal, key deliverables, stakeholders, and known constraints. This document becomes the foundation your entire template is built upon. Without it, you're building on sand.
2. Break Down Deliverables Into Actionable Tasks
Now that you have your scope defined, it's time to decompose each deliverable into specific, actionable tasks. Think of this as creating a work breakdown structure in miniature. Each task should be something a single person can complete and check off. "Design the landing page" is better than "handle the website," and "write hero section copy" is even better. The more specific each item, the less room there is for confusion or interpretation.
Task management becomes dramatically easier when every item follows a consistent format. Use verb-first phrasing: "Draft proposal introduction," "Review security scan results," "Submit final invoice." This keeps your checklist scannable and action-oriented. Avoid vague items like "follow up" or "check things," which leave team members guessing about what exactly needs to happen. If a task can't be completed in a single work session, it's probably too large and should be split further.
"A checklist item you can't complete in one sitting is a project, not a task."
Assign Ownership and Deadlines
Every task in your template needs a default owner role (not necessarily a specific person) and a relative deadline. For instance, "Design Lead, Day 3" tells future users that whoever fills the Design Lead role should complete that task by the third day of the project. This approach makes your template reusable across different teams and timelines. It also eliminates the "I thought someone else was doing that" problem that plagues unstructured projects.
Consider adding dependency indicators where tasks must happen in sequence. If "Deploy staging environment" can't start until "Complete code review" is finished, note that relationship. This mirrors how project management tools handle task dependencies, and it prevents bottlenecks when someone tries to work out of order. By the end of this step, you should have a complete list of 15 to 50 tasks (depending on project complexity) with owners, deadlines, and dependencies noted.
Templates for small projects typically have 15 to 25 items; enterprise projects may need 50 or more.
3. Organize and Format Your Template
A list of tasks dumped into a document isn't a template. Organization is what transforms raw tasks into something teams will actually adopt. Group your tasks into logical categories or phases. For a software release, you might use categories like Planning, Development, Testing, Deployment, and Post-Launch. For a quarterly audit checklist, phases could include Preparation, Data Collection, Analysis, and Reporting. These groupings give users a mental map of the project's flow.
Within each category, add priority levels. Not every task carries equal weight. Marking items as high, medium, or low priority helps team leads allocate resources effectively when time gets tight. A simple three-tier system works well for most projects. You can also add status columns (Not Started, In Progress, Complete) and a notes field for context that doesn't fit neatly into the task name. Similar to how testing and optimizing email templates requires structured iteration, your checklist template benefits from built-in fields that capture feedback during use.
Use color coding or icons for priority levels so team members can scan the template quickly during busy periods.
Choose the Right Tool or Format
Your template's format should match how your team works. Spreadsheets work well for teams that love flexibility. Dedicated project management platforms suit organizations with complex workflows. A checklist generator tool is ideal when you want to create standardized templates quickly without building them from scratch. The wrong format creates friction; the right one makes the template feel invisible, which is exactly what you want.
At the end of this step, you should have a formatted, organized template with categories, priority levels, ownership fields, and status tracking. It should look professional enough that a new team member could pick it up and understand the project workflow without additional explanation. Test readability by showing it to someone unfamiliar with the project and asking if they can follow the flow.
| Column | Purpose | Example Entry |
|---|---|---|
| Task Name | Describes the specific action | Draft project brief |
| Category | Groups related tasks | Planning |
| Owner Role | Assigns responsibility | Project Manager |
| Priority | Indicates urgency | High |
| Due (Relative) | Sets timing within project | Day 2 |
| Status | Tracks completion | Not Started |
| Notes | Adds context or links | Requires client approval |
4. Test, Iterate, and Standardize
Understanding how to create a project checklist template step by step means accepting that your first version won't be perfect. Run your template through a real project before declaring it final. Ask team members to flag items that were unclear, missing, or unnecessary. Track which tasks consistently get skipped or reworded; those are signals that the original phrasing needs improvement. Real-world testing reveals problems that no amount of desk planning can anticipate.
After one or two test runs, gather feedback in a brief retrospective session. You'll likely find that some tasks need to be split, others can be combined, and a few should be removed entirely. This iterative approach mirrors best practices across many disciplines. Just as professionals compare SSL checker tools by testing them against real scenarios before committing, you should validate your checklist template against actual project conditions before standardizing it across your organization.
Common Mistakes to Avoid
The most frequent mistake is making the template too granular. If you list every micro-action, the checklist becomes exhausting and people stop using it. Aim for the right level of detail: specific enough to prevent ambiguity, general enough to stay manageable. Another common error is building a template in isolation without input from the people who will use it daily. Templates created by one person in a vacuum rarely survive first contact with a real team.
Finally, avoid the "set it and forget it" trap. Projects evolve, tools change, and team structures shift. Schedule a quarterly review of your templates to keep them current. Remove outdated tasks, add new ones that reflect current workflows, and update ownership roles as your team grows. A living template is a useful template. By the end of this step, you should have a tested, refined checklist template that your team has validated and that you've stored in an accessible, shared location.
Never skip the testing phase. Untested templates create a false sense of readiness and often cause more confusion than no template at all.

Frequently Asked Questions
?How do I interview team members to uncover hidden checklist tasks?
?Should I build one template or separate ones per project type?
?How long does it realistically take to build a solid checklist template?
?What's the biggest mistake people make when writing checklist task items?
Final Thoughts
Knowing how to create a project checklist template step by step gives you a repeatable advantage that compounds over time. Start with a clear scope, break work into specific tasks, organize with categories and priorities, then test rigorously before standardizing.
The best templates are built collaboratively and refined through real use. Your first version will be rough, and that's fine. What matters is that you commit to iterating until the template genuinely reflects how your team works and helps them deliver better results, project after project.
Disclaimer: Portions of this content may have been generated using AI tools to enhance clarity and brevity. While reviewed by a human, independent verification is encouraged.